
Affiliate disclosure: As an Amazon Associate I earn from qualifying purchases. This article contains paid product links.
CROW & CROWN / THE FAMILY SYSTEMS EDIT
A school lunch packing checklist should change with your child’s age, appetite and independence. Start with familiar food, a container they can open, a bag that fits the complete lunch and a manageable bottle. The age-by-age guide below covers preschool through tween years, followed by fit checks and an evening-to-morning packing routine.
There are two decisions worth making before buying anything: what does your child reliably eat during the school day? And which part of packing lunch keeps going wrong? The answer changes from preschool to middle school, but the approach doesn't. Choose the food first. Design a simple system around it. Make the equipment earn its place.
This guide separates essentials from tempting extras, walks through practical setups for four school stages, compares cold containers with hot-food jars, and shows how to test a lunch kit before it becomes part of your daily routine. The product selections are curated examples, not products we claim to have personally tested.
Check the packed bag, not an empty product photo.
Can your child open, eat, close and repack?
Every washable part needs somewhere to come home.
Start your school lunch checklist with the school day
Before deciding between a bento box, food jar, or oversized lunch bag, find out what lunch at your school actually looks like. Some children eat at a classroom table; others have a short cafeteria window, a long bus ride, or no access to refrigeration or reheating. A beautifully compartmentalized box isn't helpful if the child spends the first part of lunch trying to release its lid.
The five questions that determine your shopping list
Where does lunch live?
Inside a backpack, a locker, or on a classroom shelf? Measure the available space and check whether bottles travel separately.
How long is the lunch window?
Allow for the time it takes to sit down, unwrap food, open containers and pack up. A meal that takes several complicated steps may not be practical.
Which foods actually return home?
Look for patterns over several days. An untouched main, unopened fruit or repeatedly full bottle is more informative than an aspirational shopping list.
Who cleans and resets the kit?
Consider dishwasher guidance, removable seals, drying time and whether one set of reusable parts can be ready again by morning.
What does the school allow?
Check allergy restrictions, reusable utensil rules and whether food may be stored in a refrigerator. Follow your child's individual needs and school policies.
Build the core kit before buying extras
For most lunches brought from home, the starting system is straightforward: an appropriate food container, a bag that fits it, a drink container, any required food-safe temperature control and a utensil only when the meal needs one. Napkins and labels are useful. Mini condiment pots, extra divider cups and decorative accessories are optional; each adds another piece to wash, dry and lose.
| Start here | Usually useful | Only if it solves a real problem |
|---|---|---|
| Suitable food container and bag | Water bottle with manageable closure | Extra compartment cups |
| Temperature control for perishable foods | Utensil matched to the meal | Condiment pots and sauce forks |
| Wash-and-dry routine | Waterproof name labels | Second matching bag or full accessory set |
The most important size measurement: place the full container, required cold sources, drink if carried inside, and utensil case together. Compare their actual combined width, height and depth with the usable interior of the lunch bag. Manufacturer exterior measurements can hide thick insulation or curved sides, so allow clearance at the zipper.
What to pack at every age—and why
Age is a useful starting point, not a rigid rule. A preschooler with strong fine-motor skills may manage more closures than an older child who struggles with them. The goal is to choose a packing system that suits your child's independence, appetite, schedule, and school rules—not to graduate into bigger gear on a birthday.
| School stage | The main priority | Common overbuy | Test before keeping |
|---|---|---|---|
| Preschool / pre-K | Accessible food and simple closures | Many tiny snack tubs | Open and close everything without help |
| Kindergarten / early elementary | A predictable repeatable kit | Matching accessories for each meal | Finish, repack, and zip the bag |
| Upper elementary | Meal flexibility and realistic portions | Oversized bottle or heavy box | Carry the fully loaded kit comfortably |
| Middle school / tween | Versatility and school-day fit | Extra containers for hypothetical meals | Fit backpack or locker with other school items |
01 / PRESCHOOL & PRE-K
Make independence the design brief
For the youngest students, eating time can disappear into package opening. A single container with a closure the child can manage may be more practical than multiple tiny tubs. Choose familiar foods that are comfortable to eat at a table; avoid adding a new food and a new container on the same first school day.
Start with this packing list
- One insulated bag with an easy-to-grip zipper
- One main food container that passes a home opening test
- Water bottle your child can close securely
- Napkin and easy-to-use utensils only if needed
- Clear name labels on the bag, bottle, lid and case
- Appropriate cold sources for any perishable food
- A familiar main, simple side and manageable snack if the schedule includes one
A practical example: a divided container holding a familiar sandwich or other usual main with a fruit or vegetable your child already eats, plus water. If the food is perishable, follow the cold-packing guidance later in this article. This is a layout example, not a prescribed portion or nutrition plan.
The six-minute practice lunch
- Pack the actual bag with everything you plan to send, including cooling packs.
- Have the child carry it from one room to another.
- Ask them to open the bag, main container and drink without your help.
- Let them handle the utensil, napkin and food wrappers in the planned order.
- Ask them to close and return the pieces before zipping the bag.
- Record any point that needed adult rescue. Change only that piece, then repeat.
If a closure fails repeatedly, it isn't necessarily an age issue. Swap the closure style or simplify the number of pieces. The right product is the one the child can actually use.
THE SMALL-HANDS EDIT / TWO PRACTICAL OPTIONS
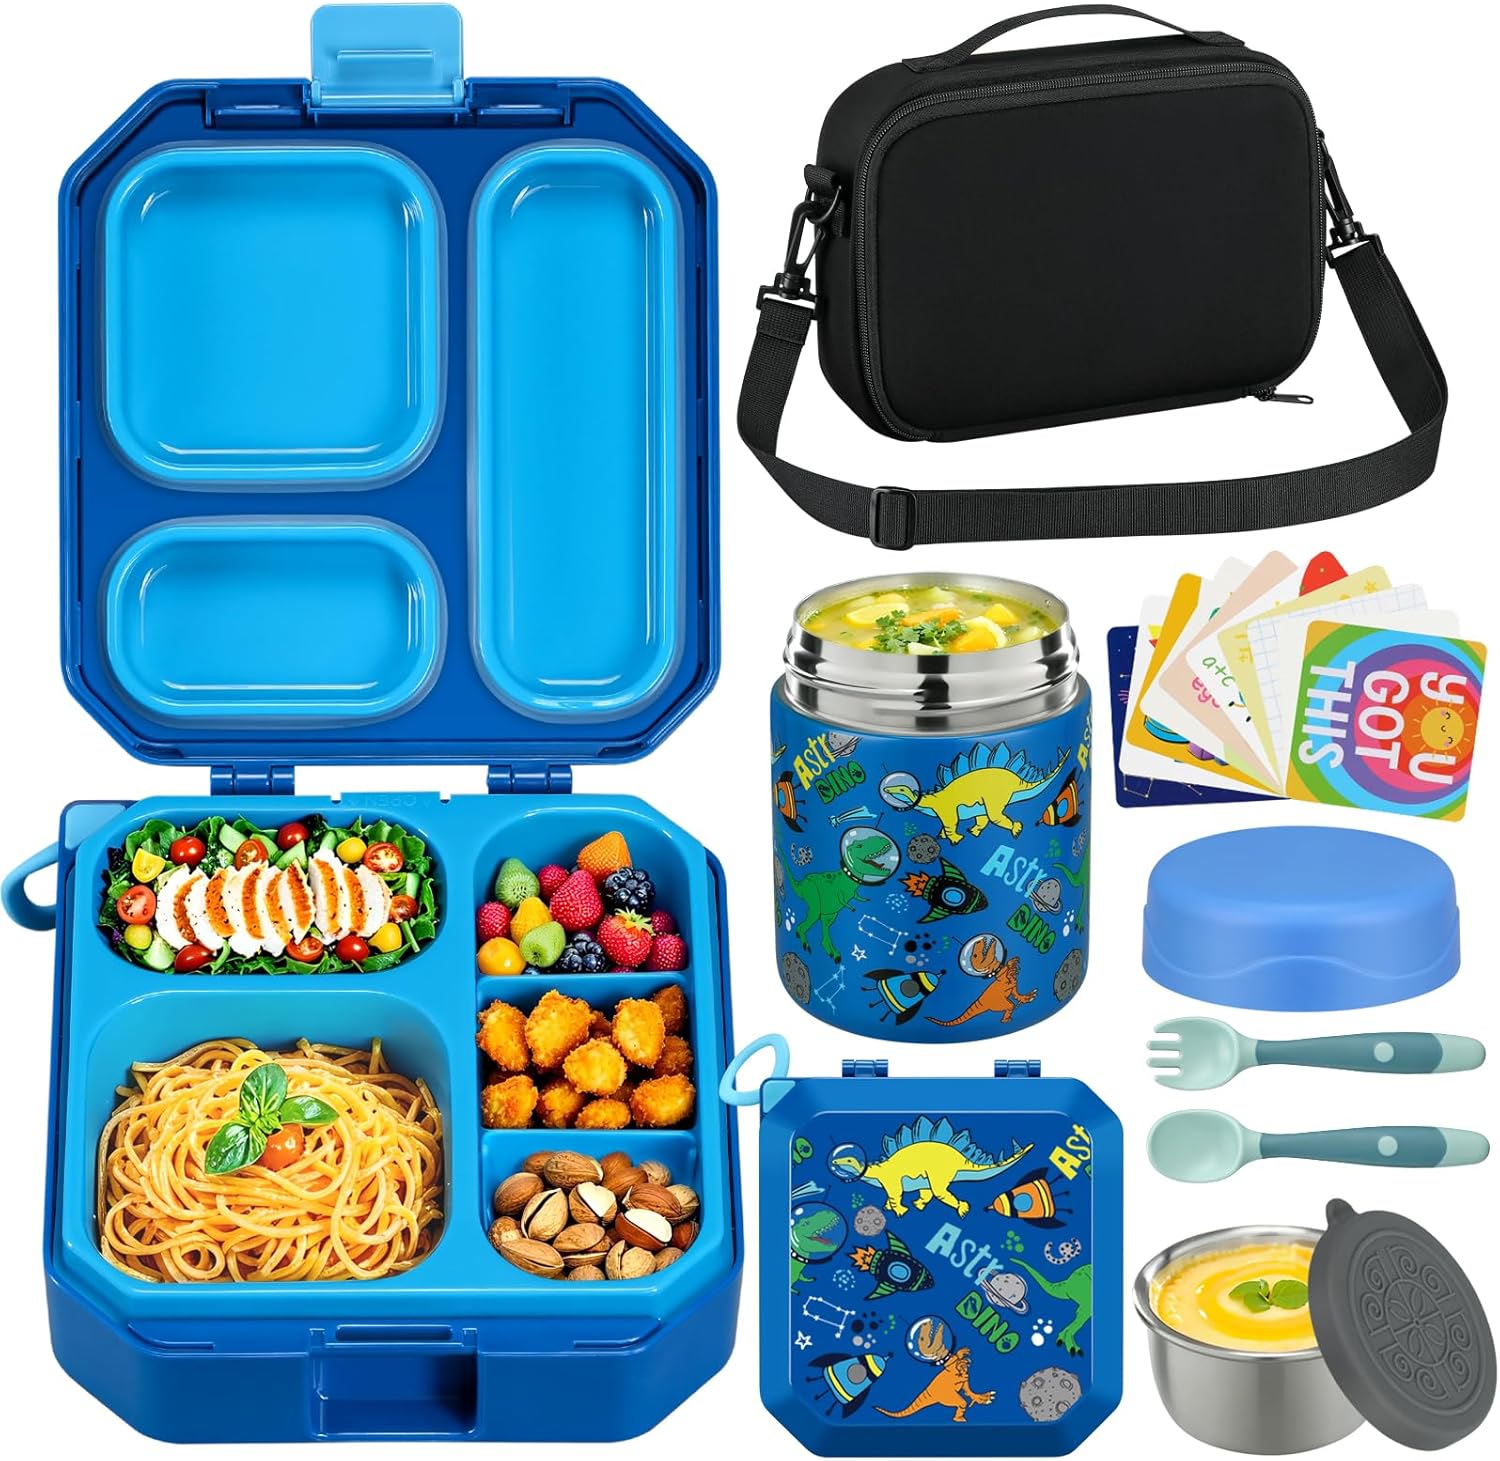
Start with a manageable water bottle and a simple container
An accessible bottle and one useful main container are a more focused first purchase than a coordinated ten-piece set. Measure the backpack pocket before choosing the bottle; check the container latch with the child before committing.

Availability and listing details can change.
The exact piece
Itslife bento lunch set with food jar
View Itslife bento lunch set with food jar on AmazonAvailability and listing details can change.
02 / KINDERGARTEN & EARLY ELEMENTARY
Build one familiar routine they can repeat
At this stage, the objective is fewer decisions in the morning. Choose a food format that works on most school days: one main container, one snack solution and one drink. Practice returning every part to the bag, because a leak-resistant closure won't help if the lid is left open before recess.
- Main container large enough for the child's usual meal
- Snack cup or side compartment, only if the meal needs it
- Familiar utensils and napkin
- Leak-resistant bottle, tested closed and tipped gently at home
- Insulated bag with required cold sources for perishables
- Simple return location for washed parts
What to change from preschool: increase flexibility, not accessory count. A child who is ready for a separate snack can add one container; a child who tends to lose lids may be better served by keeping compartments inside the main box.
03 / UPPER ELEMENTARY
Make room for appetite without creating a heavy bag
Older elementary students may have a different schedule, larger or smaller appetite, after-school activities or less time to keep track of loose pieces. Review what regularly returns uneaten before automatically increasing container size. A larger bento or sandwich box plus one flexible snack space often serves more meal types than several small specialty containers.
- Food container chosen for the actual main meal
- Separate snack storage if the school day requires it
- Bottle sized for carry comfort and the available pocket
- Food-safe temperature control when applicable
- Utensil and napkin as needed
- Room in the backpack for books and school supplies
A useful test: pack the lunch and full school bag together. Ask whether everything can be removed and repacked without pulling out the entire contents of the backpack. A large bottle that crowds homework or won't fit a pocket may be the wrong choice even if it looks durable.
04 / TWEENS & MIDDLE SCHOOL
Choose flexibility over a bigger collection
Middle schoolers might prefer a sandwich one day and warm leftovers the next. Don't buy both systems upfront unless those meals are already in rotation. Start with a dependable bag and container, then add a food jar if hot meals genuinely appear in the weekly plan. Check locker or backpack storage, travel time and who is responsible for bringing everything back.
- Container that accommodates usual portion and lunch style
- Insulated food jar when warm meals are a realistic recurring option
- Water bottle that balances capacity and weight
- Snack storage for the day's schedule
- Reusable cutlery suited to the meal
- Temperature control consistent with food-safety guidance
- One repeatable clean-and-reset routine
Two sensible routes: a cold-lunch setup with one main container plus chilled side; or a hot-food setup with a properly prepared insulated jar and a separately packed side. Both can work without buying a new matching set for every variation.
The difference between gear that looks useful and gear that is useful
It is easy to compare colors, brand names and photographs. It is harder—but far more valuable—to compare how an item functions in your kitchen, your child's bag and the school lunch window. Use these checks before keeping a product, whether you buy through one of our links or use something already in your cupboard.
Measure the entire packing footprint
Measure the interior bag after insulation, then test the real containers side by side. A rigid box may fit on paper but leave too little room for an ice source. Keep zipper pressure, leak orientation and backpack fit in mind.
Make closure difficulty visible
Try one complete lunch practice, not just opening a brand-new product in a store. Open, serve, close and repack each piece. Check whether a bottle needs two hands, whether a seal is hard to align and whether the child can tell when a lid is completely shut.
Count washable parts, not features
Removable seals and straws need proper cleaning and full drying. A clever multi-part product isn't a time saver if it requires special brushes or extra daily disassembly your household won't sustain. Check current manufacturer instructions.
Buy for the meal that happens most often
A food jar is worthwhile for a child who regularly takes warm lunches. It is unnecessary for a child who consistently prefers a simple cold meal. Similarly, a larger bottle only helps if the added weight and space work with the day.
Bento box or food jar? Choose based on meal type
| Question | Divided bento or lunch container | Insulated food jar |
|---|---|---|
| What meal fits? | Sandwiches, cold pasta and separated ready-to-eat components as appropriate | Warm meals such as soup, pasta or rice prepared and handled safely |
| Biggest advantage | Food is visible at once and can require fewer opening steps | More flexibility for meals intended to stay hot |
| What to test | Seal, divider depth, size, cleaning and leak behavior | Opening torque, safe heat retention and manufacturer preparation instructions |
| Skip it if... | The child dislikes separated meals or can't manage the closure | Warm food rarely appears in lunch or the lid is too difficult |
If you're deciding between the two, our bento box versus food jar guide explores the choice in greater detail. You do not need both simply because they're featured online.
Thoughtful pieces for specific problems
These are selected examples, not a claim that we've field-tested or ranked every product in the market. Each photo and shopping link points to its associated Amazon listing using Crow & Crown's affiliate tracking. Check the current listing for specifications, care instructions, pricing and stock before ordering; these can change. Our filter is function first, appearance second.
FOR OLDER STUDENTS / BOTTLE + WARM MEAL
Capacity where it helps. An extra piece only where it earns its space.
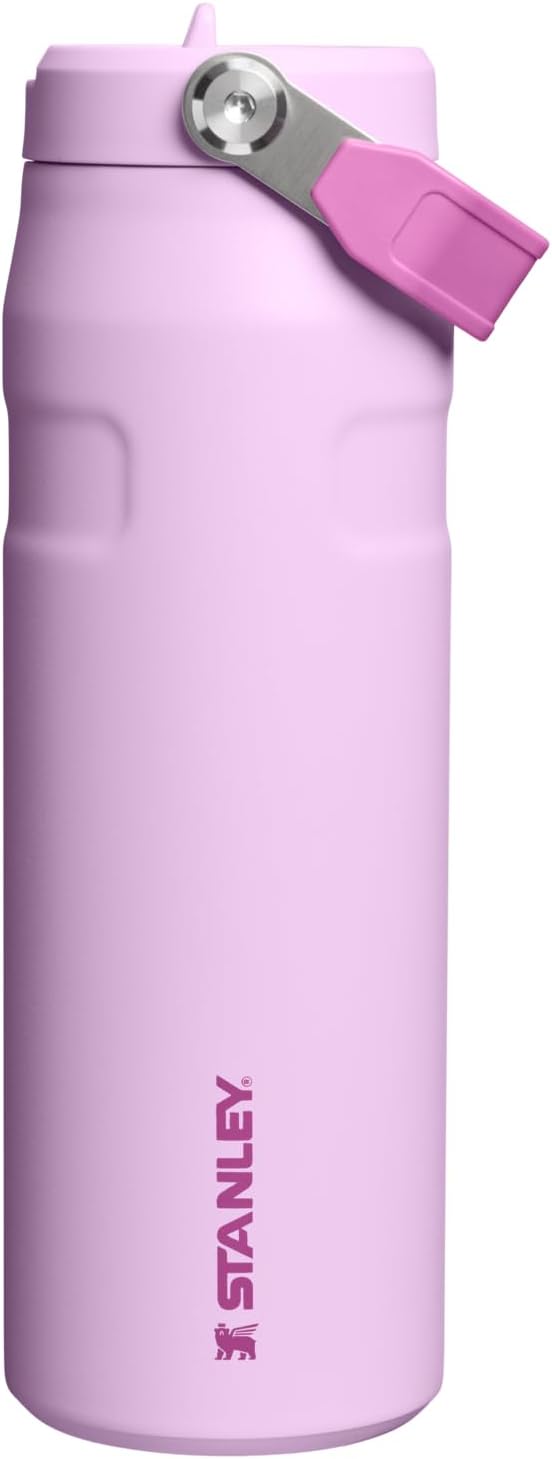
A larger bottle may suit an older child, but only after checking weight and bag fit. A food jar is a useful addition when warm meals are genuinely part of the rotation; test whether the intended user can open it.
Availability and listing details can change.

The exact piece
Stanley Classic food jar and spork
View Stanley Classic food jar and spork on AmazonAvailability and listing details can change.
A SMALL EXTRA / USEFUL FOR THE RIGHT CHILD
One utensil case, not a drawer full of accessories
For meals that need cutlery, a correctly sized fork-and-spoon set can reduce the number of disposable pieces sent to school. Confirm that the child can grip the handles and manage the case; otherwise an existing easy-to-hold utensil may be better.

Availability and listing details can change.
Keep cold food cold—and treat the ice pack as essential
Cooling is not a decorative lunch-box extra. The U.S. Department of Agriculture's Food Safety and Inspection Service recommends an insulated soft-sided lunch bag and at least two cold sources for perishable food. The USDA example is two frozen gel packs of at least 5 by 3 inches each, or one frozen gel pack plus a frozen juice box or water bottle. Pack cold sources around the perishable items, including above and below them when practical. Read USDA lunch-packing guidance.
This is important when packing foods that need refrigeration, including many meat, egg, yogurt and cut-fruit dishes. Do not assume one tiny novelty pack provides sufficient cooling. The required cooling approach depends on the food and transport conditions; school refrigeration can change the plan. When in doubt, follow the food label, school guidance and the USDA's safety recommendations.
Cold lunch: a practical packing sequence
- The night before: chill prepared perishables promptly in the refrigerator; freeze reusable cold packs according to directions.
- Before departure: load cold food into the insulated bag, place the required cold sources around it, and close promptly.
- At school: use an available refrigerator if appropriate and permitted; otherwise rely on a suitable insulated packing method.
- After school: discard food that was not safely maintained or has exceeded its safe holding time, and wash reusable containers.
The USDA also advises hot foods be packed in an insulated container prepared according to manufacturer directions, with sufficiently hot food, and kept closed until eating. If a child cannot manage a hot-food jar's lid safely, a different lunch format may be more suitable. See USDA back-to-school lunch guidance.
Allergies, school rules and sharing food
Food allergies require more than a convenient container. Confirm your child's allergy care plan and the school's rules about ingredients, labeling and sharing. The CDC's school food-allergy guidance recommends coordinated plans to help prevent reactions and respond to emergencies. A shopping checklist should never replace your child's prescribed plan or advice from their care team.
A better school-lunch system is really a better return system
A routine only works if it has an easy ending. The forgotten lid, the bottle in the car, the damp seal still on the counter—these are the moments that turn a simple school lunch into a rushed morning. Instead of adding more containers, create a clear path from packed to returned to washed to ready again.
A practical evening-to-morning reset
Empty and inspect
Bring bag, bottle, containers and utensils to one counter or sink location. Check what wasn't eaten, note recurring packing problems, and handle uneaten perishables according to safe-food guidance.
Wash, dry, stage
Follow manufacturer instructions for cleaning all seals and straws. Let parts dry fully, choose tomorrow's familiar main meal and put the nonperishable pieces back in their designated location.
Load once, verify once
Put prepared chilled food and appropriate cold sources in the insulated bag. Add drink and utensils, check closures, and hand the child a kit they already know how to manage.
For siblings: assign each child one return station, basket, or color marker for loose items. The routine can be shared while the individual meal and container choices remain different. Don't make children manage a complicated sorting system just to keep adult storage looking perfect.
Five sample lunch formats to rotate—not five new products to buy
| Format | What goes in the kit | What changes |
|---|---|---|
| Simple cold main | One familiar main, a side and drink | Insulated bag and appropriate cold sources when needed |
| Divided cold meal | Usual main plus separately stored fruit or vegetable | One suitable divided container, not extra tiny cups |
| Warm-food day | Appropriately prepared warm main, separate side | Food jar and safe handling; test lid independence |
| Snack-heavy timetable | Meal plus separate snack allowed by school schedule | One extra practical snack container if needed |
| Longer activity day | Meal and planned snack suitable for child's needs | Reassess bag space, carry weight and food safety |
These are packing structures, not nutritional prescriptions. Adapt to allergies, appetite, the school's schedule and guidance from your child's healthcare professionals where applicable. If you need physical organization ideas, our home school-lunch station guide
The mistakes that make lunch harder
Buying the bag before the container
The bag's stated size can include padding and insulation. Choose the container and cooling method first, then check what actually fits inside.
Confusing extra compartments with a better lunch
More spaces can mean more planning, washing and fiddly closures. Use a divider only if it solves a real preference or packaging issue.
Skipping temperature control
For perishables, use an insulated bag with appropriate cold sources. Never assume a thin novelty ice pack will replace the USDA-recommended setup.
Buying a large bottle by default
Capacity matters, but so does loaded weight, backpack fit, and whether the child can close the lid completely after drinking.
Ignoring cleaning time
Removable valves and seals may require extra attention. If the household can't clean and dry it consistently, the gear isn't simplifying anything.
Trying a complicated meal on a rushed day
Introduce unfamiliar gear and food formats during a practice lunch at home. Establish the routine before making it more ambitious.
Before you checkout
Do I need a new lunch box for every school age?
No. Keep a functioning setup until it stops fitting the child's routine. Reassess closures, size, capacity and washing needs when the actual school day changes—not just when a child moves to the next grade.
Should I buy a bento box and an insulated food jar?
Only if both cold divided lunches and warm meals are part of your realistic rotation. Start with the type your child eats most, then add the second format if a clear need appears.
How many reusable ice packs should I pack?
For perishable foods, the USDA recommends an insulated soft-sided bag with at least two cold sources, such as two properly sized frozen gel packs or a gel pack plus a frozen drink. See the linked USDA guidance and follow school conditions.
What if my child struggles to open lunch containers?
Try a full home packing test, then identify the exact failure point: zipper, latch, seal, bottle cap or cutlery case. Replace or simplify the difficult piece rather than buying an entire matching set.
How do I know if I am packing too much?
Review what routinely returns uneaten, how long lunch lasts, and what the child can realistically manage. Adjust to the child's needs and school schedule. There is no ideal number of containers that works for every child.
Can I pack warm leftovers?
Warm-food lunches require safe food handling and appropriate insulated containers. Follow USDA instructions and the manufacturer's preparation directions, and choose a container your child can use safely.


